Tutorials
Create Woo Product Table for each Vendor of Dokan Plugin
Time needed: 2 minutes
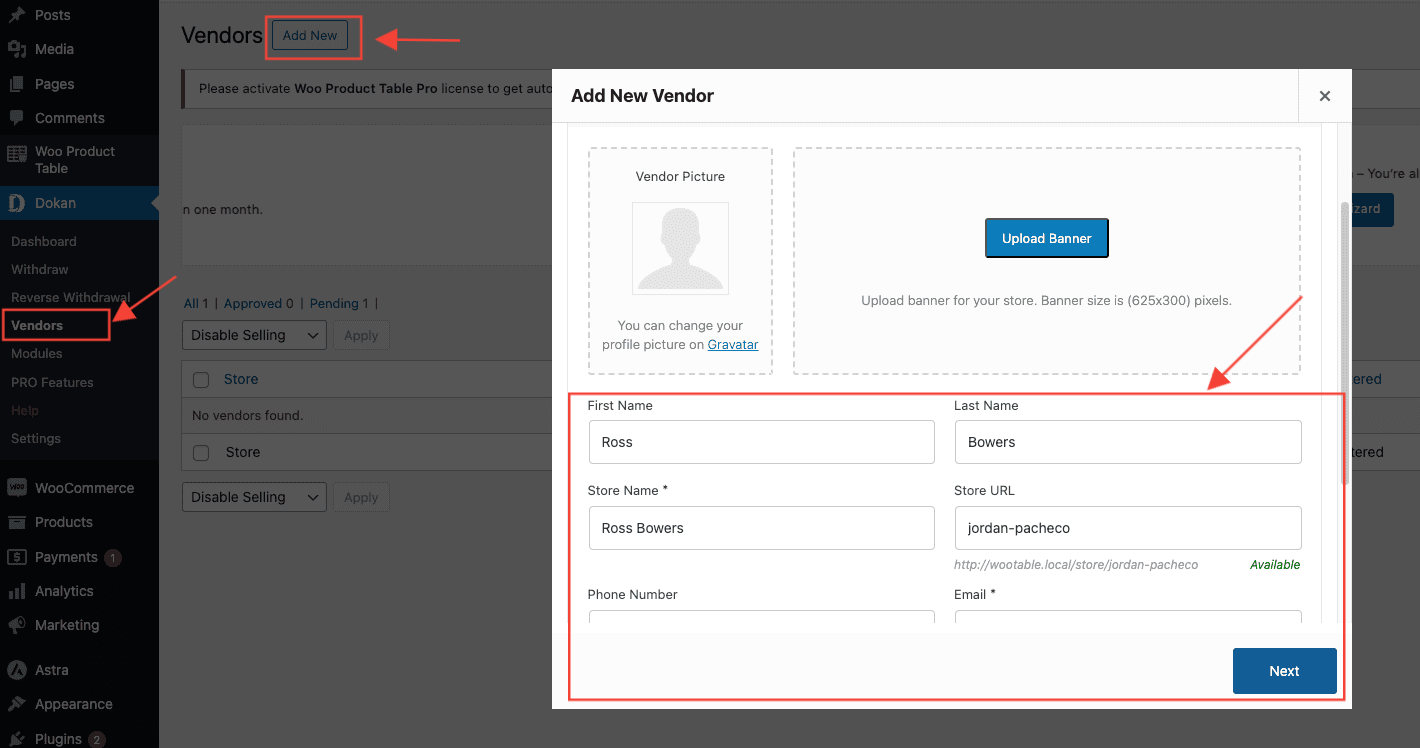
- Create a Vendor with Details in Dokan:
- Navigate to Dokan and create a new vendor profile.
- Fill in the necessary details for the vendor, such as name, contact information, and store settings.
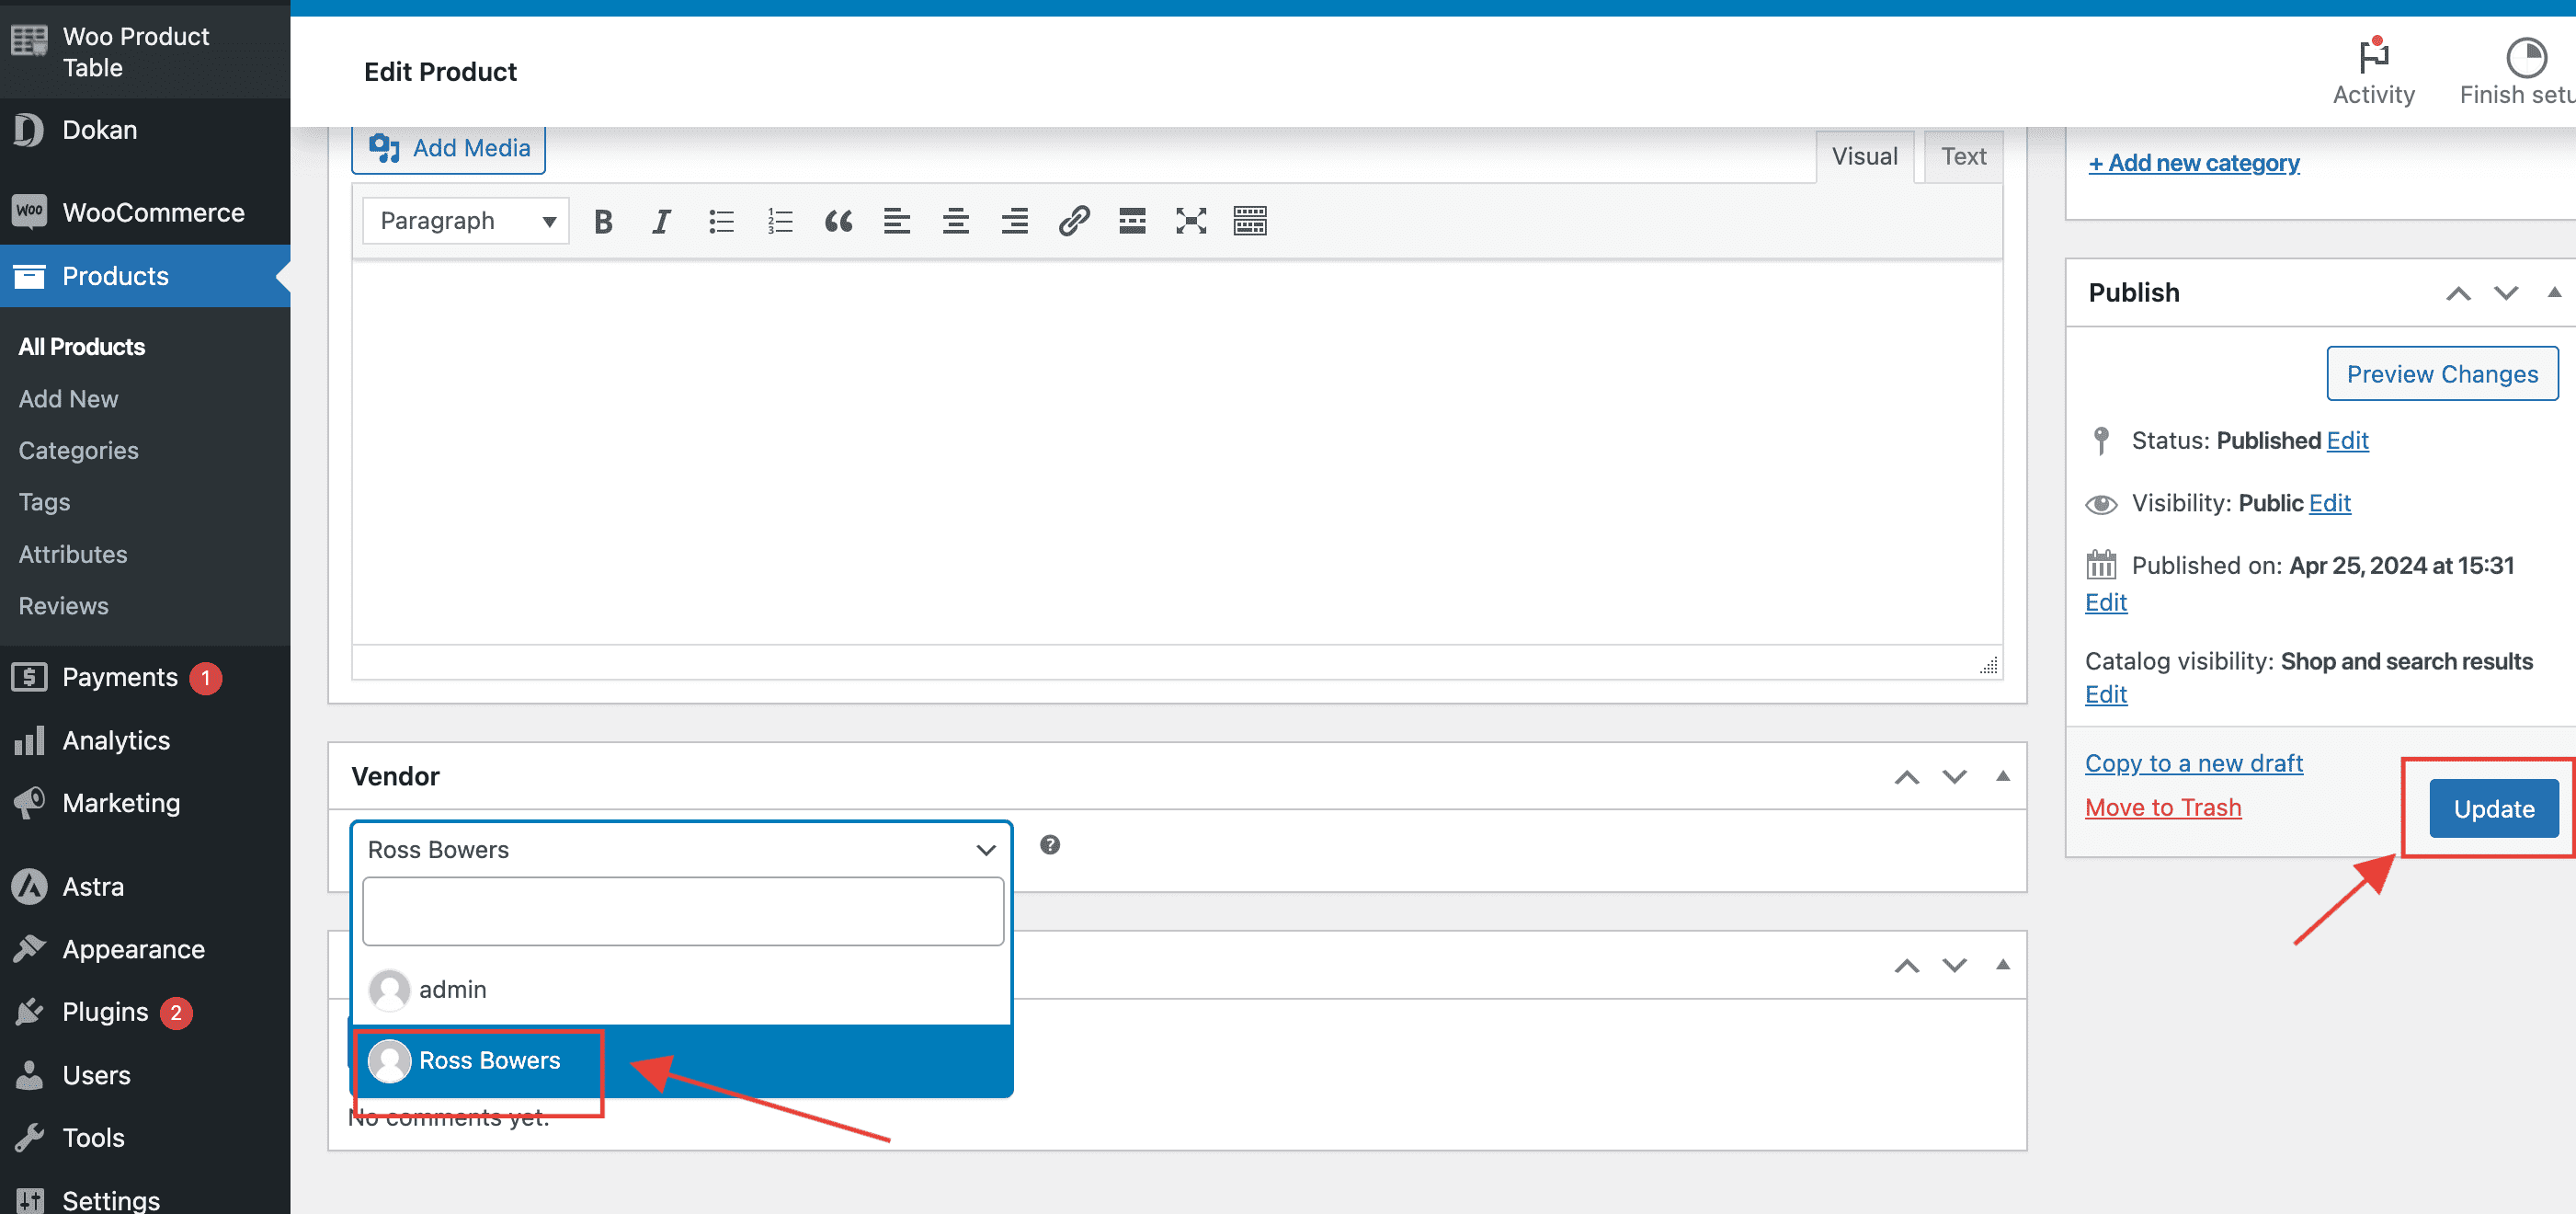
- Edit your Product:
- Go to "All Products" in your WordPress dashboard.
- Select the individual product you want to assign to a vendor and click "Edit." - Assign Vendor to Products:
- In the product editing screen, locate the vendor options and assign the product to the respective vendor's store.
- Create a Product Table with Vendor Name:
- Create a new product table and give it a name corresponding to the vendor whose products will be displayed in the table.
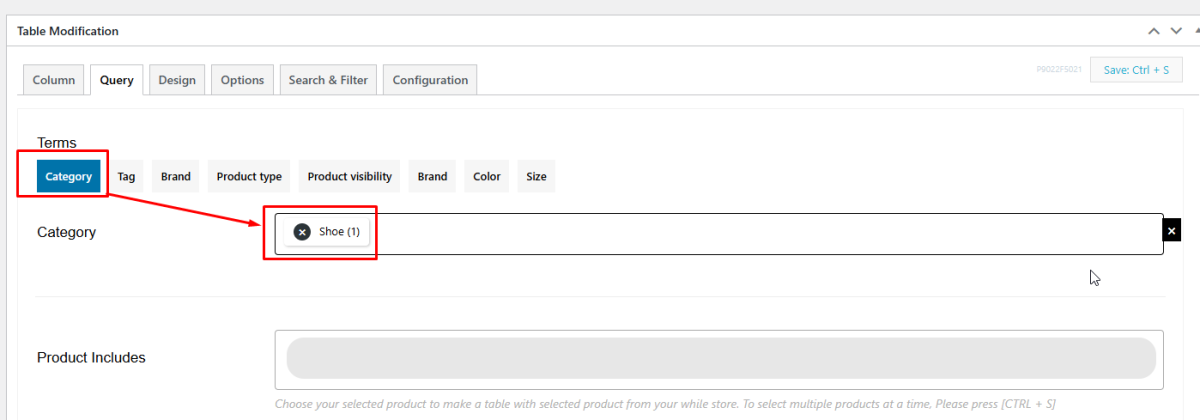
- Navigate to the "Query" tab.
- Assign the product category or individual products associated with the vendor to be displayed in the table.
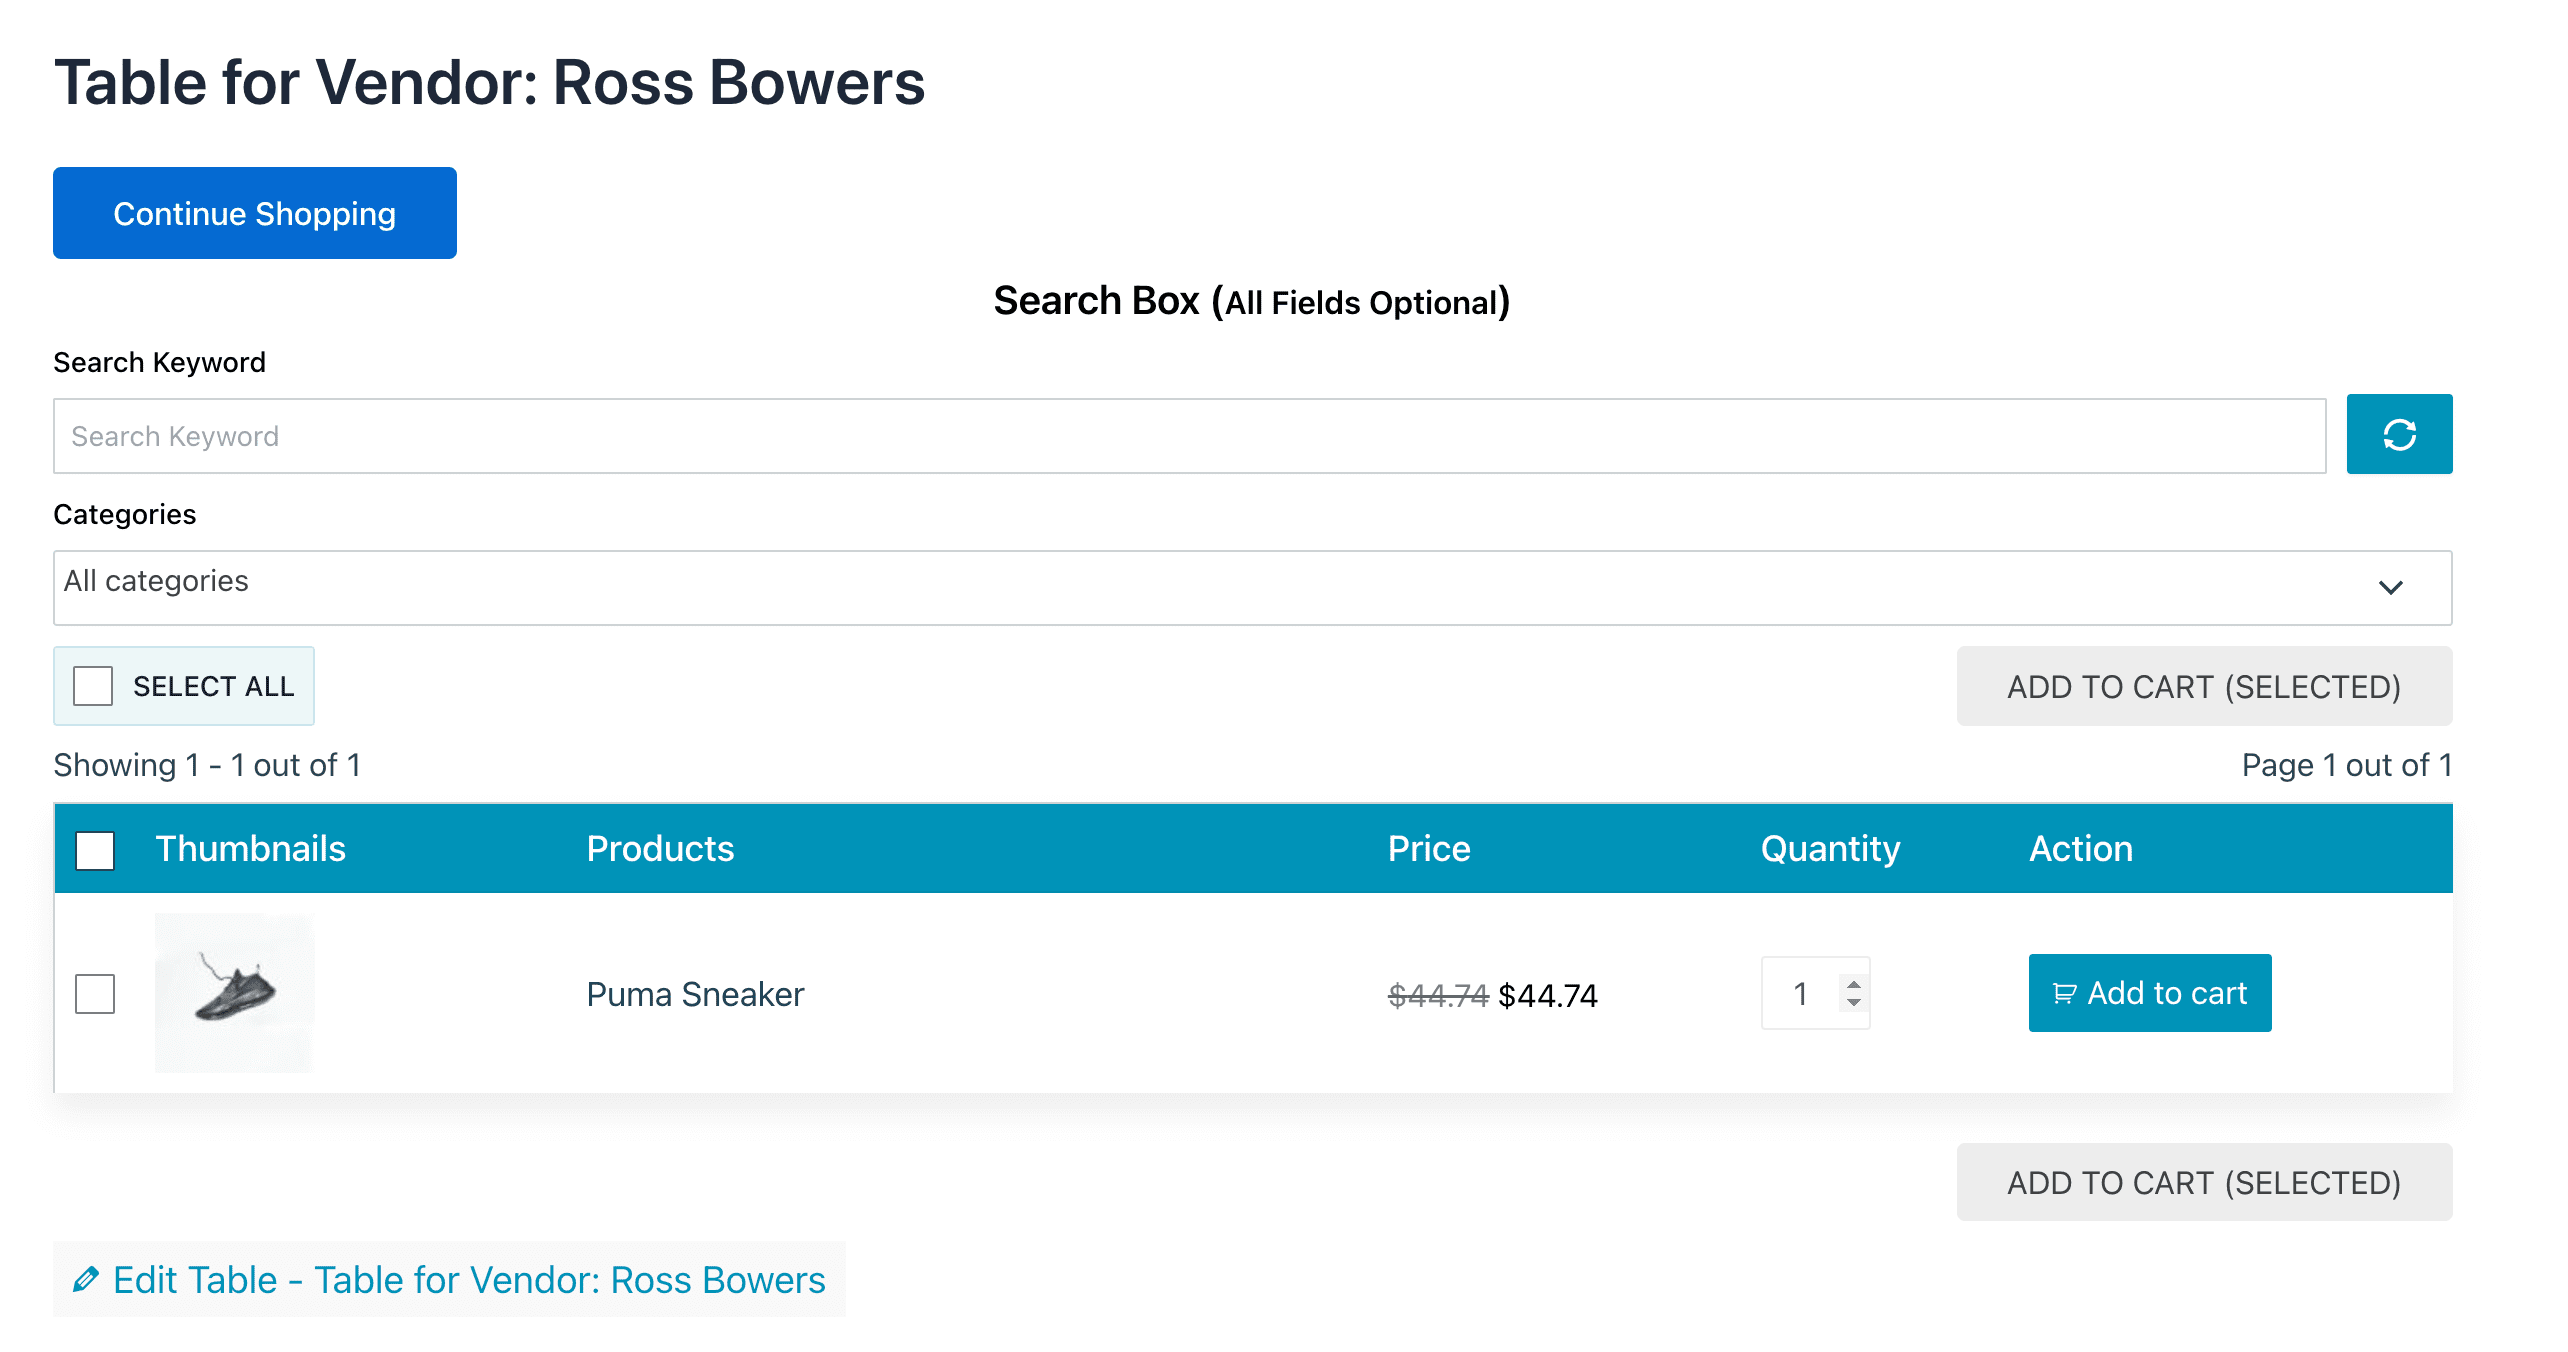
- Save the changes to apply the configuration. - Individual Vendor Table: